Replacing and Securing Ceramic Bearings on Foil Drive™ MotorUpdated 4 months ago
Replacing and Securing Ceramic Bearings on Foil Drive™ Motor
If you have damaged a ceramic bearing in your Foil Drive™ motor, please follow the instructions and videos below to assist you with replacing them.
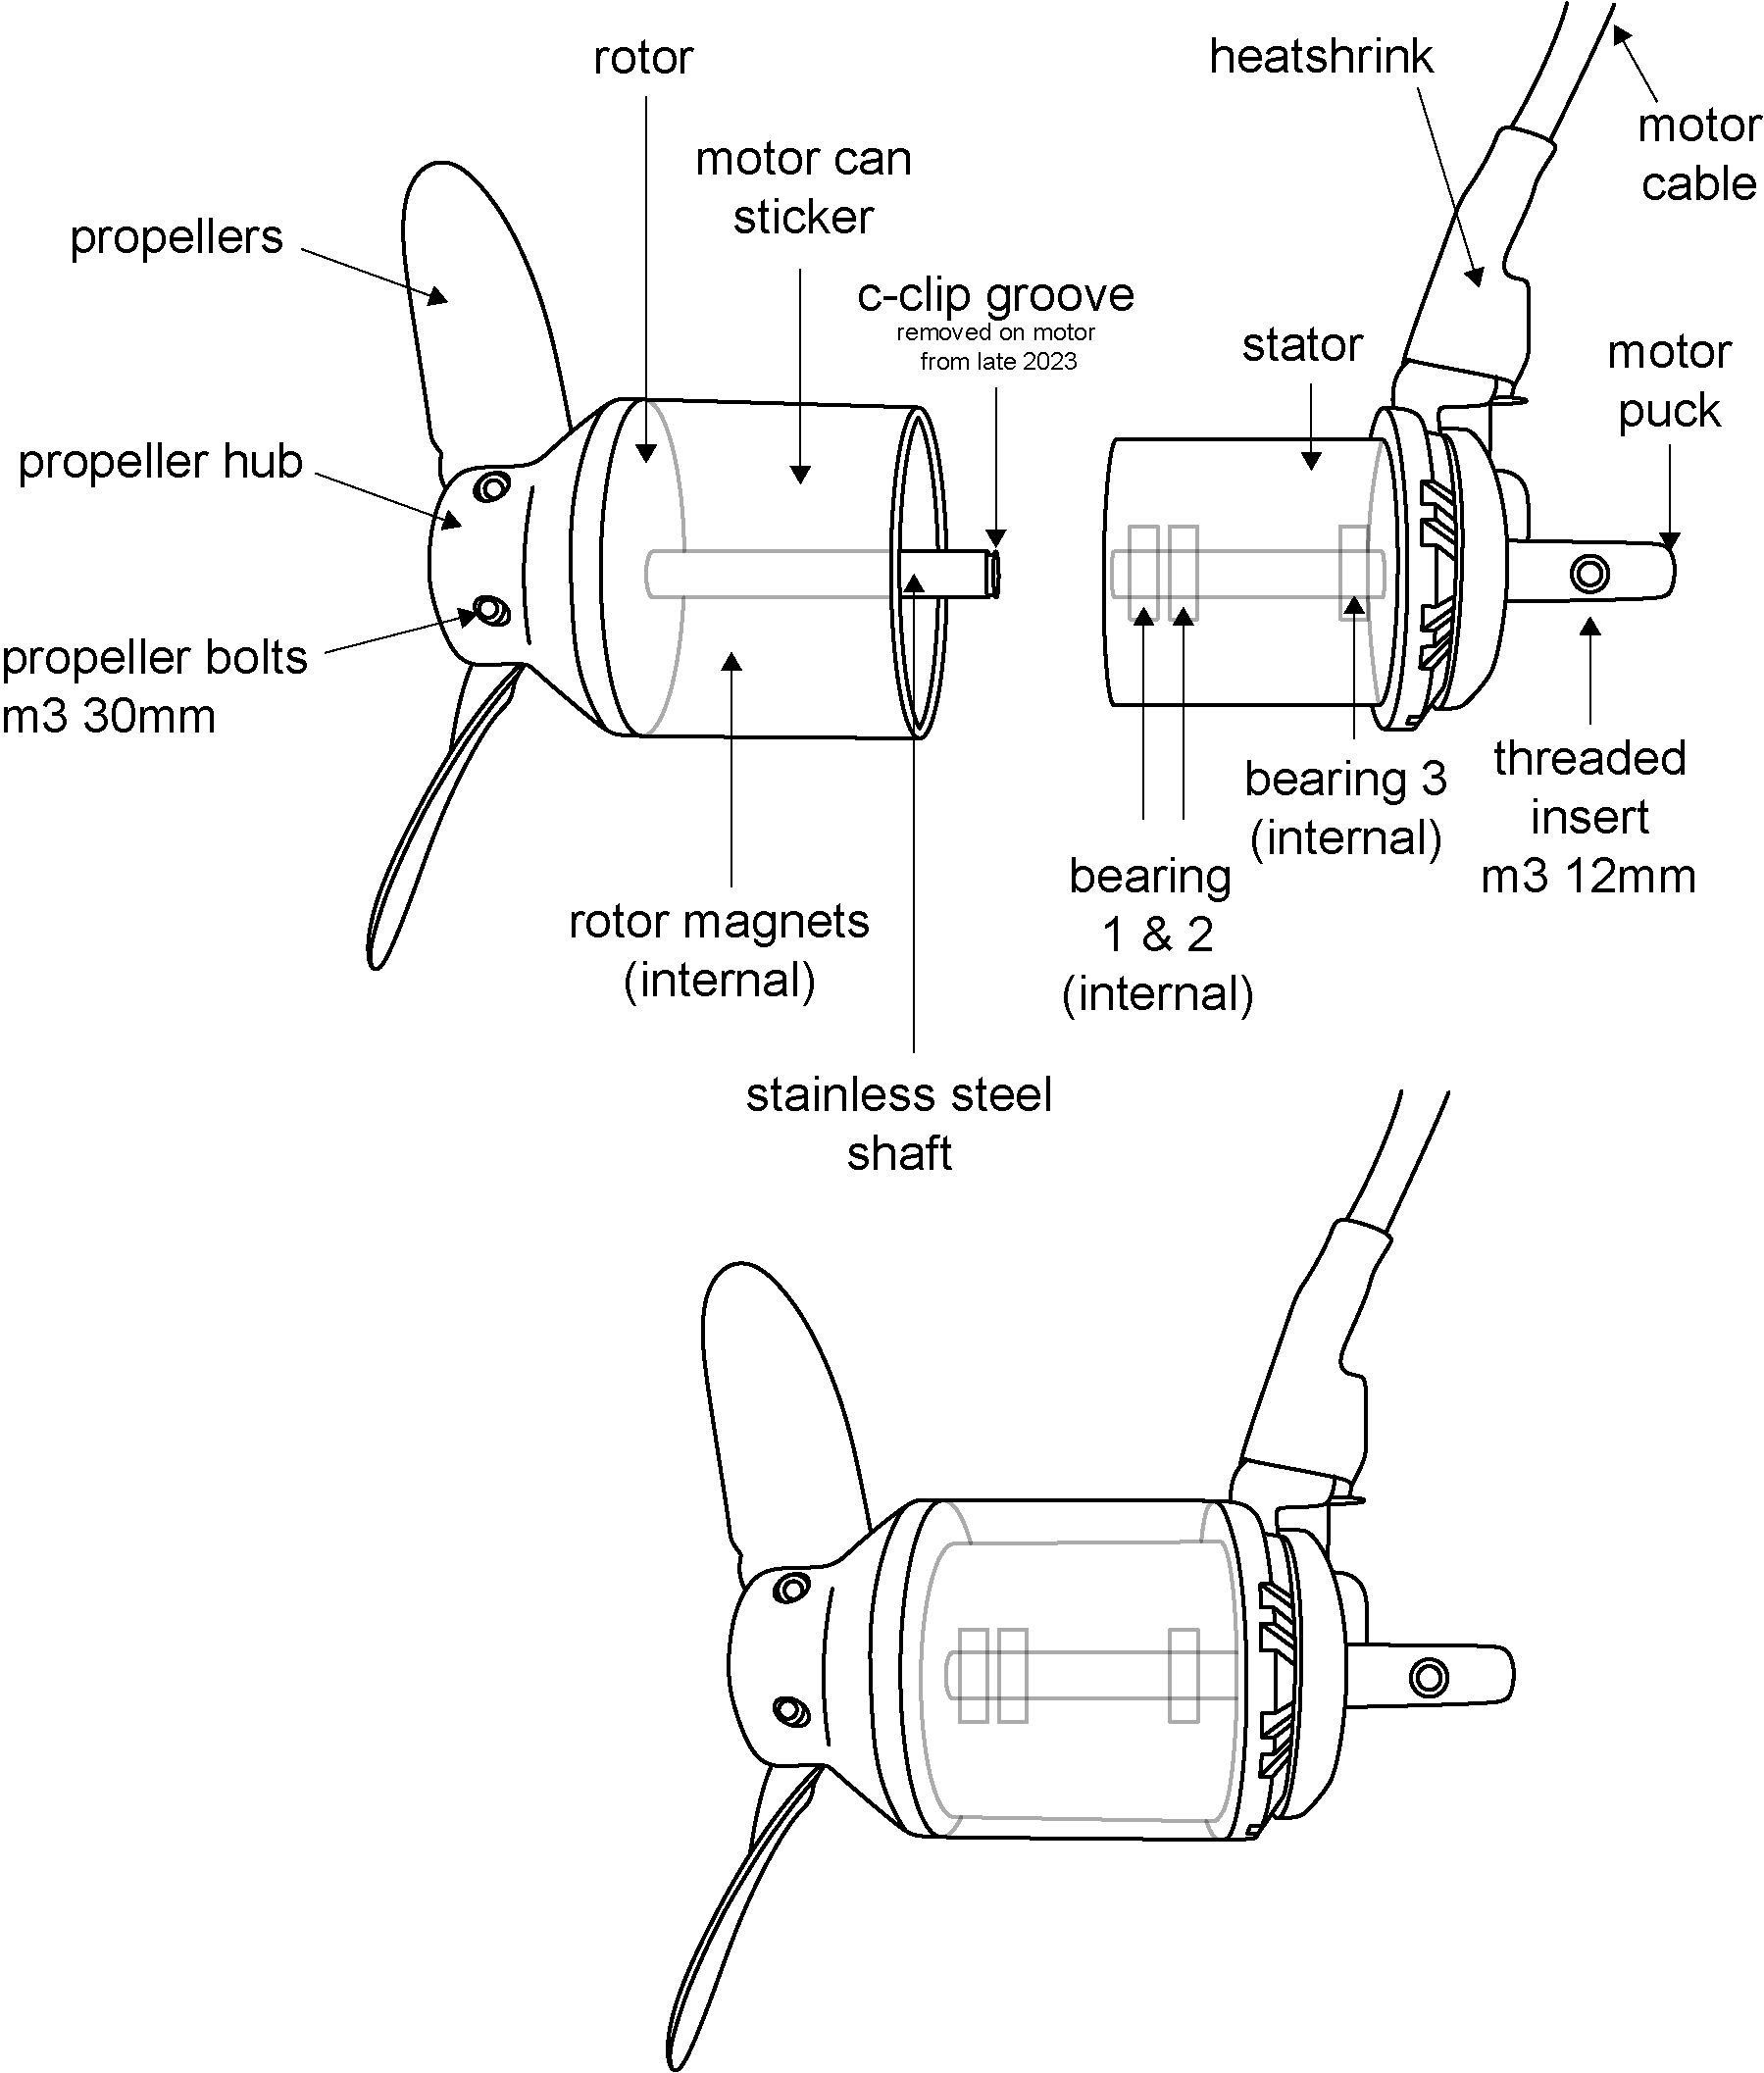
Below is a detailed diagram of the parts of your Foil Drive™ motor. In this video series, you will be working with the stator, replacing bearings 1, 2 & 3.
NOTE: When placing the motor can/rotor back on the stator, you MUST use two hands to slowly guide it back on. Once the magnets grab, you must ensure the rotor doesn't slam against the stator otherwise you risk damaging your bearings.
You will need:
- Flat blade screwdriver
- Clean dry rags or cloth
- Loctite 620, 648 or 680 retaining compound *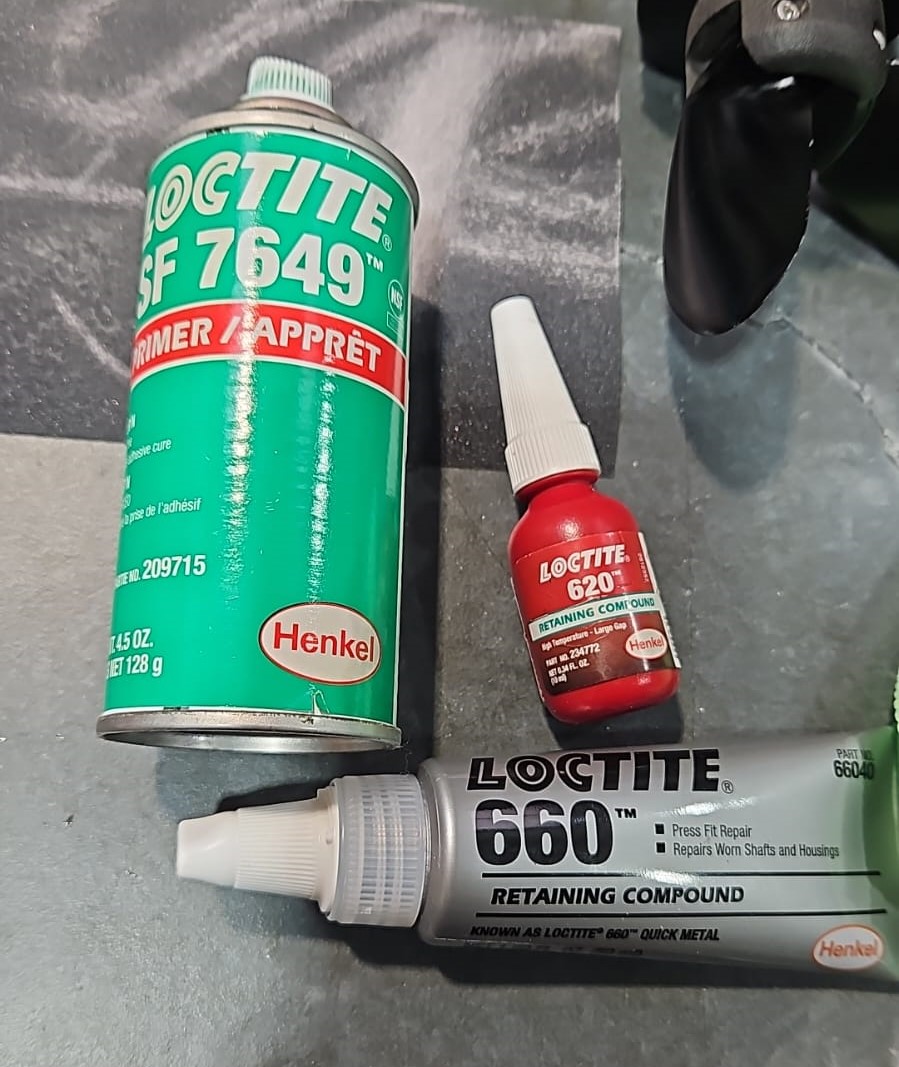
- Replacement Foil Drive Ceramic Bearing and press tool
Potentially need:
- Small Hammer (Not always required)
- WD40, Lanolin, Inox
- 600 – 1200 grit sandpaper
* We currently recommend Loctite 620. The 7649 is a primer that can be used to prepare the surface. 660 is the other recommended adhesive that seals a larger gap or takes up a larger cavity between the bearing and motor.
Warning: If you need to remove an old or broken bearing from your stator, please wear eye protection and gloves as small shard of broken ceramic can be very sharp.
Note: If you have trouble removing the ceramic housing, you will need to use a screwdriver (or similar) and a hammer and tap the housing in short, sharp bursts to crack the housing to release it.
Always wait 24hrs for the bearing retaining compound to cure before using your motor.
Tech Talk | Ceramic Motor Bearing Care
Below is a detailed video on everything you need to know about ceramic bearing maintenance, care, and replacement.
Below are older videos, broken down into segments pertaining to each bearing location as well as a video on how to add additional hold on your bearings.
Part 1: Replacing bearing 1 & 2
Part 2: Replacing bearing 3
Part 3: Securing the bearings
PART 1: Replacing Bearing 1 & 2
In the video below, you will learn how to replace ceramic bearings 1 & 2, which are sitting on top of each other on the top of your stator.
PART 2: Replacing Bearing 3
The video below will show you how to replace the 3rd ceramic bearing, located under the puck.
PART 3: Securing the bearings.
If you find your bearings are still coming lose, we recommend using Loctite 480 and applying it around the outside housing of your bearing, securing it to the stator.
Watch the video below to see how.
If you need assistance or have any questions, please send us an email to [email protected]